Do You Need Oil to Cook Bacon? A Practical Guide
Explore whether oil is necessary for cooking bacon, learn dry-pan methods, and master crispy results with or without added fat. This step-by-step guide from Cooking Tips covers techniques, safety, and practical tips for home cooks.

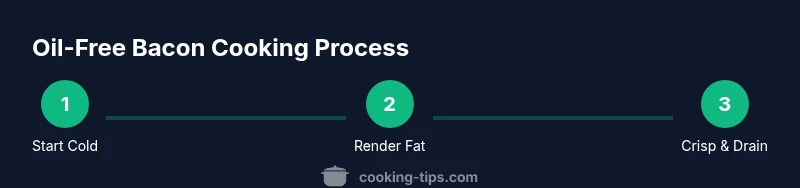
Do you need oil to cook bacon? Not necessarily. A dry, cold-pan method works well: place bacon in a skillet and heat slowly to render fat, then flip until crisp. The fat released from the bacon itself acts as its own lubricant. For very lean bacon, add a small amount of oil or use parchment to guard against sticking.
Do You Need Oil to Cook Bacon? Understanding the Basics
According to Cooking Tips, the short answer is that oil is not always required to cook bacon. A dry, cold-pan approach leverages the fat the bacon releases as it heats, creating enough lubrication to prevent sticking in most cases. Start with a cold skillet and lay slices in a single layer; heat slowly to render fat, then turn for even crispness. This method minimizes added fat while preserving rich, smoky flavors. The Cooking Tips team found that thickness, pan material, and crowding influence results, so adjust heat and spacing accordingly. If you’re using very lean cuts, you might add a small amount of oil or use parchment as a light shield to reduce sticking. The goal is to let the bacon’s own fat do the job while you monitor heat and timing for your preferred crispness.
Do You Need Oil to Cook Bacon? Understanding the Basics
Tools & Materials
- bacon(Choose thickness based on preference (thin, regular, or thick-cut))
- frying pan (preferably cast iron or stainless steel)(A 10–12 inch pan fits a single layer of bacon well)
- spatula or tongs(For turning and removing strips)
- paper towels(For draining fat after cooking)
- parchment paper (optional)(Helps prevent sticking with very lean bacon)
- oil (optional)(Only needed for very lean bacon or if sticking occurs)
Steps
Estimated time: 15-20 minutes
- 1
Gather equipment and ingredients
Collect your bacon, pan, spatula, and paper towels. Ensure the pan is dry and clean, and that you have enough room for a single layer of bacon without overlapping. This upfront preparation reduces surprises during cooking.
Tip: Having the pan ready prevents rushing heat work and helps you keep control. - 2
Lay bacon in a cold pan
Place the bacon in a single layer in a cold skillet. Do not crowd; allow space for fat to render and move the slices as needed. This initial setup reduces sticking and promotes even rendering.
Tip: Starting cold helps control fat rendering from the beginning. - 3
Heat gradually to render fat
Turn the burner to medium-low and let the pan heat slowly. As fat begins to render, the bacon will start to shrink and release its own oil. Patience pays off with crisp edges and balanced flavor.
Tip: If the bacon starts to curl, press it gently with tongs to maintain contact with the pan. - 4
Flip and cook to desired crispness
Use a spatula or tongs to flip the slices and cook on the other side until crisp to your liking. Most bacon browns and crisps in about 8–12 minutes total, depending on thickness and pan heat.
Tip: Rotate batches if needed to maintain even heat across the pan. - 5
Drain and rest before serving
Transfer the cooked bacon to paper towels to drain excess fat, then let it rest for 1–2 minutes to finish crisping. Serve promptly for best texture and flavor.
Tip: Save the rendered fat for future savory dishes if desired.
Quick Answers
Do you need oil to cook bacon?
Not always. A dry pan can render fat from the bacon itself, producing crisp results with minimal added fat. Oil is optional and mainly used for very lean slices or when sticking occurs.
Generally, you can cook bacon without oil, using the fat it releases to lubricate the pan.
Can I cook all types of bacon without oil?
Most bacon types can be cooked oil-free with a dry-pan method, but very lean varieties may benefit from a small amount of fat or parchment to prevent sticking.
Lean bacon may stick if you don’t monitor heat; consider a tiny amount of oil if needed.
Is baking bacon better for oil-free cooking?
Baking can reduce splatter and provide even cooking with less hands-on attention, though it takes longer. It’s still possible to do oil-free by letting the fat render in the oven.
Baking is a good oil-free alternative if you prefer hands-off cooking.
What heat level should I use?
Start on low to medium-low heat and gradually increase as fat renders. This minimizes burning and delivers even crispness.
Low to medium-low heat is best to render fat slowly.
How can I prevent bacon from curling?
Lay strips flat, press down with a spatula briefly after placing in the pan, and avoid overcrowding so every piece makes contact with the hot surface.
Press bacon lightly to prevent curling and ensure even cooking.
How should I handle and store rendered bacon fat?
Let the fat cool, strain if needed, and store in a clean jar. Use within a few weeks to flavor vegetables, eggs, or potatoes.
You can reuse the fat for future cooking to add flavor.
Watch Video
Top Takeaways
- Cook bacon in a cold pan to render fat gradually
- The bacon’s own fat lubricates the pan and flavors the result
- Lean bacon may need a touch of oil or parchment to prevent sticking
- Avoid overcrowding to ensure even crisping
- Drain on paper towels and rest briefly for best texture