Cook Outside: A Practical Guide to Outdoor Cooking
Learn safe, delicious outdoor cooking with practical gear, heat control, and simple recipes. This expert guide covers camp stoves, fuel types, weather considerations, and cleanup for backyard and camping adventures.

Master outdoor cooking with this comprehensive guide that covers heat management, safety, gear selection, and simple, delicious recipes. Learn to choose camp stoves, charcoal, or gas grills, establish heat zones, and navigate wind and weather. Ideal for backyard barbecues, camping trips, or weekend getaways where you want tasty meals cooked outdoors.
Why cook outside
Cooking outside is more than a hobby; it is a way to unlock different flavors and textures that can elevate everyday meals. When you cook outside, you can achieve smoky notes from charcoal, a crisp sear on a cast iron skillet, and a sense of freedom that comes from relying on simple, portable tools. The Cooking Tips team believes that successful outdoor cooking blends practical planning with flexible techniques. This section explains why people choose to cook outside, the core advantages, and how to approach outdoor cooking with confidence, whether you are grilling in a backyard, camping with friends, or setting up a camp kitchen in the woods. Expect better browning, more dynamic crusts, and a kitchen that travels with you.
Key ideas: planning matters, heat control is king, and safety comes first. As you gain experience, your outdoor meals will feel as satisfying as anything you make indoors, with the added joy of fresh air and scenery.
Equipment choice
Choosing between a camp stove, a charcoal grill, or an open fire depends on location, weather, and what you want to cook. Camp stoves offer consistent heat and weather resilience, while charcoal grills deliver a deep smoky flavor. An open fire provides novelty and a rustic feel but requires more attention to heat and safety. Start with a simple setup and gradually add more gear as you get comfortable. The main benefit of cooking outside is expanding your cooking toolbox and learning to manage heat without a traditional kitchen.
Safety mindset
Outdoor cooking requires vigilance about fire safety, food safety, and personal safety. Always have a water source or sand nearby to control flare-ups, store perishables in a cooler, and keep children and pets away from the cooking area. Wear heat-resistant gloves and use long-handled tools to minimize risk. By establishing clear zones and routines, you reduce accidents and keep the experience enjoyable for everyone involved.
Essential gear you’ll rely on
Modern outdoor cooking blends sturdy gear with smart organization. A reliable camp stove or grill, a cast-iron skillet or Dutch oven, long tongs, a digital thermometer, heat-resistant gloves, a fire extinguisher or water bucket, aluminum foil, and a cold cooler for perishables form the core toolkit. Add a stable table or rock surface for prep, a windbreak to stabilize heat in breezy conditions, and spray oil to prevent sticking. With these basics, you can tackle a wide range of recipes outdoors.
Heat management and fuel options
Outdoor heat management hinges on selecting the right fuel and creating effective heat zones. Gas stoves offer steady heat with quick ignition; charcoal provides richer flavor but slower heat buildup and longer cooling. For complex dishes, a two-zone setup with direct heat for searing and indirect heat for slower cooking helps prevent burning while ensuring doneness. Wind and altitude affect heat, so shield your setup and adjust fuel accordingly. A thermometer is invaluable for maintaining target temperatures.
Techniques you can use outside
Explore a mix of direct heat, indirect heat, and foil packet methods. Direct heat is perfect for searing steaks or vegetables; indirect heat works well for thicker cuts or larger fillets. Foil packets trap moisture and flavors, great for fish, chicken, or veggie medleys. Cast-iron cookware excels outdoors because it heats evenly and retains heat even when the surrounding surface cools down. Practice with simple recipes to build confidence before attempting more ambitious meals.
Simple outdoor recipes to start
Begin with approachable dishes such as foil packet chicken with peppers and zucchini, corn on the cob grilled over medium heat, and roasted potatoes in a cast-iron pan. A lemon herb fish fillet can cook quickly in a sealed packet, while grilled veggie skewers offer color and variety. For dessert, try s'mores or baked apples wrapped in foil. The key is to prep ingredients in advance and maintain a steady heat source so foods cook evenly.
Cleanup, safety, and wind-down
After cooking, let metals cool before touching, wash cookware with soap and water, and dry completely to prevent rust. Pack leftovers in a cooler, label containers, and dispose of waste in accordance with local rules. Document wind and weather notes to improve future sessions and ensure safe extinguishing of any remaining embers. A tidy cook space makes outdoor cooking a repeatable joy.
Weather, environment, and etiquette
Weather can dramatically influence outdoor cooking outcomes. Stay aware of wind shifts, rain potential, and ambient temperature. If conditions become harsh, move to a sheltered area and adjust your plan. Respect rules in parks or campgrounds about fires or stoves, and leave no trace by cleaning thoroughly and minimizing noise and odor.
Authority sources for outdoor cooking safety
For safety guidelines and cooking standards, consult reputable sources from government and education domains to inform your practice. This page avoids speculative claims and points you to established resources for safe outdoor cooking.
Authority sources (extended)
- US Department of Agriculture Food Safety and Inspection Service: https://www.fsis.usda.gov
- National Institute of Food and Agriculture (extension services): https://extension.illinois.edu
- Centers for Disease Control and Prevention food safety pages: https://www.cdc.gov
Tools & Materials
- Camp stove or grill(Propane/butane or charcoal-ready setup)
- Fuel and ignition supplies(Keep spare canisters and matches or a lighter)
- Cast-iron skillet or Dutch oven(Preheat before cooking; handle with gloves)
- Long-handled tongs(Sturdy and heat-resistant)
- Meat thermometer(Monitor internal temperatures accurately)
- Heat-resistant gloves(Protect hands from hot surfaces)
- Aluminum foil and a cooler(Foil packets and food storage)
- Water or sand bucket(Control flare-ups and emergencies)
- Oil spray or neutral oil(Prevent sticking and promote browning)
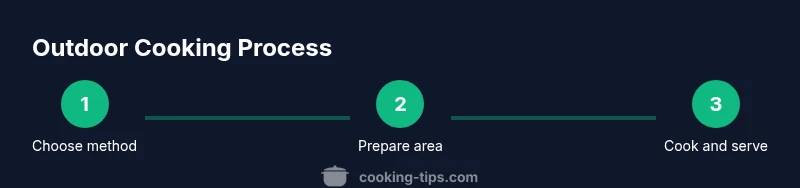
Steps
Estimated time: 1 hour 20 minutes
- 1
Assess environment and select method
Evaluate location, weather, and safety constraints. Decide between camp stove, charcoal grill, or open fire based on rules and conditions. This choice guides all following steps.
Tip: Choosing early avoids rework and keeps ingredients organized. - 2
Set up a stable cooking area
Create a flat, fireproof prep zone with a stable surface. Clear obstructions and position tools within reach. Keep children and pets at a safe distance.
Tip: Use a rock ring or sturdy table to prevent tipping. - 3
Establish heat zones
Create a high-heat zone for searing and a cooler zone for indirect cooking or resting. This helps you manage multiple foods at once without burning them.
Tip: A two-zone setup is ideal for most outdoor cooking scenarios. - 4
Preheat equipment and prep ingredients
Preheat pans or grills for even browning. Season and pat dry ingredients; wash and chop produce in advance to save time.
Tip: Dry surfaces promote browning rather than steaming. - 5
Cook with accurate temps and technique
Keep to target temperatures and flip foods only as needed for even cooking. Use direct heat for searing and indirect heat for delicate or thick items.
Tip: Use a thermometer to ensure safe eating temperatures. - 6
Rest, then serve and enjoy
Allow meats to rest after cooking to redistribute juices. Plate with simple sides and serve promptly to maintain quality.
Tip: Rest time improves juiciness and flavor. - 7
Store leftovers safely
Cool quickly and refrigerate leftovers promptly. Use labeled, airtight containers and keep perishable items cold in a cooler when away from home.
Tip: Do not leave perishable food out for more than two hours. - 8
Clean up and extinguish safely
Extinguish flames fully and drive away embers safely. Clean cookware, pack up gear, and leave the site as you found it.
Tip: Always have a plan to extinguish a fire if wind shifts.
Quick Answers
What equipment do I need to cook outside?
A reliable heat source (camp stove or grill), sturdy cookware (cast-iron or aluminum), long-handled tongs, a thermometer, and safety gear. Keep a fire extinguisher or water nearby.
You’ll need a heat source, durable cookware, and safety gear for outdoor cooking.
Is outdoor cooking safe for kids and pets?
Keep children and animals away from the cooking area. Use boundaries and supervise at all times to prevent accidents.
Keep kids and pets away from the cooking area for safety.
How do I control heat when outdoors?
Use two-zone cooking, adjust fuel, and shield wind. A thermometer helps monitor internal temperatures.
Set up heat zones and monitor temps with a thermometer.
What are safe food temperatures for outdoors?
Cook meats to safe internal temperatures, such as poultry at 165F (74C). Use a thermometer to verify.
Meat should reach safe internal temperatures; use a thermometer.
How should I handle cleanup outdoors?
Cool cookware, wipe clean, and pack leftovers in a cooler. Dispose of ashes following local rules.
Wipe and pack leftovers; dispose of ashes as required by local rules.
What if weather turns bad?
Move to a sheltered area, adjust your cooking plan, and ensure fuel stays dry. Have a backup plan.
Have a backup plan for wind or rain.
Watch Video
Top Takeaways
- Plan heat zones before cooking
- Prioritize safety with fire and food
- Use durable cookware for outdoor use
- Monitor temperatures with a thermometer
- Clean up thoroughly and respect local rules